
The kitchen is the room in our house that gets the dirtiest. In addition to prepping three meals and who knows how many snacks a day, it’s where our family consumes all of those meals. Bacteria and germs can survive in your kitchen for months, so a deep cleaning should be happening from time to time. To help you make your kitchen deep cleaning quick, easy, and that much more effective, here is our deep cleaning kitchen checklist.
General Tips For Kitchen Deep Cleaning
Every home is different, so if the kitchen cleaning checklist is not a specific match to your kitchen, you can skip a step and continue on. However, these general tips will likely apply to anyone looking to do a deep clean of their kitchen.
- Before you start, clear the kitchen out, remove everything off the shelves and table, and move it out of the room
- This is a time to declutter, free up counter space and get rid of things that you no longer use
- Always start your cleaning routine from the top down so dirt and debris don’t fall on newly cleaned areas
- Take all dirty kitchen towels and rags and place them in the washing machine; as you clean and go through rags, fill up the washer and do a load of laundry at the end of your deep cleaning
- Try to set aside time to clean for a few hours; it’s much easier to knock out the kitchen deep cleaning process when you can dedicate all your time to it for a few hours
- Put music on or listen to a book on tape to help the time go faster while you clean
- With the amount of cleaning you will do when you deep clean your kitchen, consider using mild and natural cleaners to make the process safer
- On the night of your kitchen deep clean, grab takeout for dinner! The last thing you will want to do is prepare a large meal in your perfectly clean kitchen
Preparation
As I mentioned, you will want to get everything out of your kitchen before starting the process. Once you have that done, here are the supplies I would add to your kitchen deep cleaning checklist.
- Dish soap
- Bowl
- Cleaning cloths (microfiber)
- Vacuum
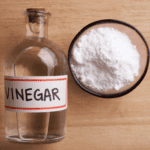
- Baking soda
- White distilled vinegar
- Toothbrush
- Glass cleaner (Windex)
- Steam cleaner or steam mop
- Mr. Clean Magic Eraser
- Stainless and granite cleaning supplies
Kitchen Deep Cleaning Checklist
This free kitchen cleaning checklist starts at the highest point in your kitchen and works its way down to make it easier for you to visualize the process, work smarter, not harder and get this done faster. I encourage you to take a good look at your kitchen before starting; sometimes, seeing the progress you have made can be motivation to get it all done.
Light Fixtures
Light fixtures are often ignored, but they get dusty and can attract bugs. If you have a small step ladder to use to reach your light fixtures, it makes this process easier and keeps you from climbing on counters!
- Turn off the lights in your kitchen
- Use a vacuum with an attachment to carefully vacuum any of the dust or bug matter that has collected in and around the lights
- Use a damp microfiber cloth to wipe down the light fixtures, be careful if you are working with a chandelier or ornate light fixture so that you don’t damage it in the process
- If you have any blown bulbs, replace them now
Tops of Cabinets
If your cabinets go all the way to your kitchen ceiling, you get to skip this step! If your kitchen cabinets have space between the top and the ceiling, get ready to find some dust you didn’t think existed.
- The tops of the kitchen cabinets are not visible, so cleaning here does not have to be perfect, but the dust should be removed
- Take the vacuum and do a really good clean of the tops of the cabinets; get into all of the crevices
- Remove any of the display items you may put on the tops of your cabinets
- Wash those items in the kitchen sink and dry them before returning them to the cabinet top
Cabinets
I recommend cleaning your entire cabinet, but I can tell you almost all the dirt will be around the handle. The kitchen cabinets can get dirty, especially when you have something like olive oil on your hands, and you open a cabinet door.
- Create a cleaning solution in a bowl with three parts water, one part white vinegar, and a few drops of dish soap
- Wipe down all the cabinets from top to bottom with a wet rag covered in your cleaning solution
- Pay particular attention to the handle of the cabinet where most of the debris sits
- If the handles themselves are dirty, create a baking soda paste (one part baking soda, one part water) that you can let sit on the handles for a few minutes to get them restored
- When finished cleaning the cabinets, wipe them dry before moving on to future steps
Walls and Doors
The Mr. Clean Magic Eraser is my best solution for kitchen walls and doors.
- Start on one end of the kitchen and wipe down walls and doors from top to bottom
- If you see areas that need touch-up paint, this is a time to do it
- Make sure the wall or door is completely dry before adding touch-up paint
- Don’t use too much water on the walls and doors; it is not necessary
- Wipe down light switches when cleaning the walls and doors
Windows
Window cleaning is often a separate day in our house. However, we have a few windows in the kitchen and a sliding glass door that need a little extra attention.
- Use a window cleaner like Windex and spray it on your dirty windows
- Wipe down with a paper towel so there are no streaks
- If you have a glass stove or glass oven door, don’t use commercial window cleaning products
- Once you finish the window cleaning, put the window cleaner away, and don’t make the mistake of using it on other areas of your kitchen (it can cause damage because of the chemical composition)
- I would dust blinds with a microfiber cleaning cloth while I’m right next to them cleaning the windows
Oven and Stove Top
If you have a self-cleaning oven, now is a great time to turn that on and let the oven do its thing.
- Start with the stovetop by using a kitchen stovetop cleaner or creating a paste with baking soda, vinegar, and water, and clean the stovetop thoroughly
- For stainless steel appliances, use a stainless cleaner on any area of the oven or stovetop that needs it
- Take out the racks from inside the oven and wipe them down with soap and warm water
- Clean the control panel on the oven or stovetop with a damp microfiber cloth
Microwave
The microwave is a small area in the kitchen, but it can hold a lot of bacteria and even smell because of old food.
- Place a microwave-safe bowl of water in your microwave and heat it for three minutes
- Let the steam from the water sit for a few minutes before opening the microwave door
- Remove the bowl of water and clean the microwave with the vinegar, water, and dish soap solution
- Wipe all areas, and use a toothbrush to scrub old stains or food
- If you have a removable microwave plate, take it out and wash it in the kitchen sink
- Wipe clean the exterior door of the microwave with soap and water
Refrigerator
You may say most of my kitchen cleaning tips are fairly standard, but when it comes to the refrigerator I’m pretty particular about how this process has to go.
- Remove everything from your refrigerator (yes, all of it!)
- Clean all shelves with water, vinegar, and dish soap solution
- Remove any drawers that you can and wash them fully in the kitchen sink
- Clean up any spills or stains
- Put things back into the refrigerator one by one; if you have expired food or food items that you are not going to use, get rid of them
- Once everything is put back in, clean the outside of the refrigerator; if it is stainless steel, use a specific stainless steel cleaner
Countertops
The countertops in your kitchen can get dirty (and hold bacteria and germs); they should be empty at this point, giving you plenty of clean space to work.
- Wipe down all countertops with a clean cloth that has water and dish soap on it
- Make sure to get the areas that are further back, as dirt and dust can collect
- Start to return things to clean surfaces like the coffee maker or the mixer
- As you bring each thing back to put on the countertops, make sure it’s really necessary, and ensure that you clean it before putting it on the clean counter
Kitchen Table or Office Area
If you don’t have a kitchen table or desk area in your kitchen, you can move on.
- Wipe down the kitchen table and all chairs with a damp cloth
- If you have things on the table (paperwork, mail, kid’s art projects), now is the time to sort them
- Look through the office area of the kitchen and see what should be there and what could be put away
- Make this space usable again after a good cleaning and organization
Dishwasher
The dishwasher is often left off of cleaning checklists, and it shouldn’t be. Dishwashers get those dirty dishes cleaned up, but they are known for holding onto old food and smells!
- Place a dishwasher-safe bowl on the top rack of your dishwasher
- Add one cup of vinegar to the bowl
- Run the dishwasher on a normal cycle
- When finished, clean the outside of the dishwasher with microfiber cloths and a little soap and water; again, if you have stainless, use a stainless cleaner
Sink
The sink is something that you should be cleaning almost daily. However, for this type of deeper clean or spring cleaning, you will want to break out the toothbrush.
- Create a baking soda paste with one part baking soda and one part water
- Use a toothbrush to scrub the sink and get into all of the hard-to-clean areas
- Rinse with hot water, and wipe with a soft sponge if there are additional stains or areas of discoloration
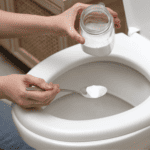
Disposal
You can purchase a garbage disposal cleaner that can help with odor and ensure cleanliness. However, in my own kitchen, I simply use ice and salt.
- Fill your sink with ice cubes and salt (about a half cup)
- Allow the solution to melt just a little
- Turn on the garbage disposal and run it for about a minute
- Rinse with hot water
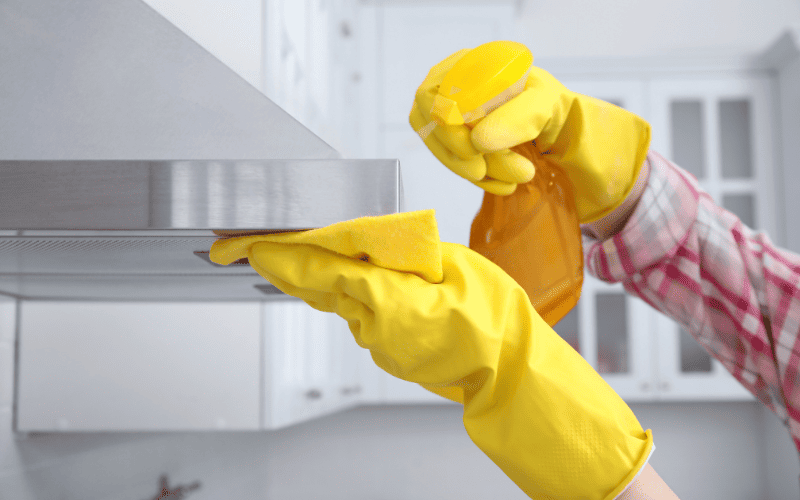
Appliances
To keep appliances clean, wipe them down when there is the slightest sign of spilled food. Although I included appliance cleaning individually above, you can give them all a quick once over and see if there is anything additional that needs your attention.
- Any appliances that have a self-cleaning cycle should be utilized during this process
- Use a damp cloth to wipe things like the range hood, ice maker, and any other appliances that you have in your kitchen
- If you have stainless, use a great stainless cleaner
- For any areas that have caked-on food or grease, use a soft old toothbrush to scrub
Food Storage
This is where I get the kids involved in my kitchen deep cleaning, they have fun with the process, and it saves me some time.
- Remove all food from the pantry
- Check for expiration dates
- Wipe down all shelves
- Replace shelf liners if necessary
- Replace all items in a clean and organized manner
Garbage Can
If you have a removable trash can, take it outside for cleaning. Don’t forget the cabinet the can is in; it could use a good wipe-down.
- Take the garbage can outside and fill it with soap, water, and a cup of baking soda. Let the can sit for a few hours while you are finishing your kitchen
- If there is a particular smell or stain, you may need to use a heavy-duty cleaner before bringing the can back inside
- Let the garbage can dry before putting it back in the cabinet with a fresh trash bag
Flooring
Whether you have wood floors or tile floors, you will need to finish the deep cleaning process by tending to the mess on the floor. If you did a great job throughout the rest of the kitchen, there is probably some dirt on your floor.
- Start by vacuuming the floor and ensuring you get under the kitchen cabinets and cupboard doors
- Clean the floor using a mop or a wet cloth, and work around the kitchen on your hands and knees
- If your tile floor has dirty grout, use a handheld steam cleaner to remove any dirt or discoloration
Time and Frequency
I know this kitchen cleaning checklist may seem a little extensive. If you are worried about finding the time to deep clean your kitchen, don’t stress. Deep cleaning tasks do not need to happen often or take hours. Having the right kitchen cleaning tools and staying up to date with daily cleaning makes a big difference.
- A full kitchen deep clean will take most homeowners about two to three hours. If your deep cleaning tasks are made more difficult by dealing with stains, caked-on grease, or clutter, add extra time to your estimate
- Deep cleaning your kitchen is impacted by both kitchen size and current cleanliness, but cleanliness is a bigger indicator of how long the process will take
- When doing a good deep cleaning, you should stay in the kitchen the entire time. If you can stay focused on your cleaning checklist, you will get this done much quicker than breaking it into smaller tasks
- I would recommend a deep clean once a quarter or four times a year if you have a clean kitchen; if you lack the day-to-day cleaning habits, you may have to do this one per month
- If you really want to avoid the block of time it takes to do the deep clean, clean your kitchen well on a weekly basis, wipe down appliances after use, set a schedule to clean countertops and sinks, etc. When deep cleaning comes around, you may just have to wash windows and blinds
Frequently Asked Questions
How can I deep clean my kitchen if I have limited time?
If you don’t have much time but need your kitchen deep cleaned, start with a bowl of soapy water and make your way from one area of the kitchen to another. Although it may not be as detailed of a cleaning as our step-by-step guide, it’s certainly enough to get the kitchen cleaner.
What are some common mistakes people make when deep cleaning their kitchen?
Here are a few of the most common mistakes people make when deep cleaning their kitchen:
- Forgetting to start from the top down
- Not keeping a handheld vacuum nearby to continually clean up dust and dirt
- Using products like Windex as a universal cleaner
- Keeping too much clutter in their kitchens
- Walking away from the process when it’s not complete