


Being experts in the house cleaning industry, we always get excited when we start approaching our favorite holiday season — spring cleaning!
As the flowers come into bloom and the spritely trill of songbirds returns to ruin our mornings, so too does our inner house cleaner emerge from hibernation, refreshed and ready to tackle that most daunting of cleaning projects.
We know that not everybody gets as pumped as we do about this time of household renewal, but we also appreciate how crucial it is to the health and well-being of the home. If you’re dreading the upcoming deep clean, we’ll help you make the best of a challenging situation with our complete spring cleaning guide.
The Spring Cleaning Checklist
Before you begrudgingly jump into spring cleaning, you need to cut yourself some slack. National Cleaning Week may run at the tail end of March, but only 31% of Americans use that time for their spring cleaning. Some people wait until April or later, and 17% of Americans don’t do any cleaning at all. If you plan to clean at some point, pat yourself on the back because you’re doing better than a lot of people already!
The point is, you don’t have to wait until March to do your cleaning, and you don’t have to feel rushed as spring approaches. As long as you can set aside a few days at some point each year, you can schedule your spring cleaning season for any month that works. Make it easy by doing one room a day, or challenge yourself by cleaning the entire home in a single marathon.
Once you decide on your deep clean schedule, follow our spring cleaning checklist to make sure you cover all of your bases. Keep in mind that you’ll have to do dishes, wipe down countertops, and scrub the toilet as part of a spring cleaning, but we left chores like that off the list because you should be doing those weekly, if not every day. In this spring clean checklist, you’ll find the chores that often go overlooked the rest of the year but make a huge difference in the look, comfort, and safety of the home.
1. Get Rid of Clutter
As it turns out, your most vital spring cleaning tool isn’t your Dyson vacuum, Swiffer duster, or even your all-purpose vinegar cleaner — it’s a plastic bin.
Well, several plastic bins, to be correct.
Labeling boxes and bins to organize your clutter as you go through your belongings will be an enormous help throughout your spring cleaning adventures. Put at least three in each room as you work on them. Make one bin (or bag) a garbage bin, make one a donate bin, and another a keep bin.
Moving from the back corner of the room toward the door, start sorting everything you come across that’s out of place. Keep whatever “sparks joy” or otherwise has value to you, and get rid of the rest.
2. Clear Out and Change Up Your Wardrobe
As you’re sorting and organizing your belongings, your closet will probably demand close attention. Even though we enjoy beautiful weather all year in California, you may still have seasonal clothing to swap out. Now is the perfect time to do so!
Use your storage bins to begin cleaning out the closet, putting clothes aside until next season or sorting unwanted items into a donate pile.
A helpful trick to get rid of old clothes is to put all of your seasonal clothes on the hangers with the hook on the backside of the garment rod. As you use them and put them back in the closet, put the hanger back on the rod facing the other direction. At the end of the season, you’ll see which clothes you wore and which ones you never touched, making it easy to decide what to keep.
3. Rotate Your Mattress
One of the simplest but most beneficial spring cleaning chores is rotating the mattress. Most mattresses don’t have symmetrical layering from top to bottom, so they don’t need to be flipped. But turning them 180° is a wise idea because it helps even out the wear on the support layers.
4. Check Safety and Security Equipment
Even though you’ll likely have to change them out several times throughout the year, spring cleaning is an excellent time to double-check your smoke detector, carbon monoxide detector, and security system batteries and recharge them as needed. Test all of the alarms to ensure they’re working.
Make sure you have updated emergency service contact numbers posted in a place where all family members can find them. It’s also a perfect time to check the status of your fire extinguishers. Look over each one to check for damage and see if they are past their scheduled replacement dates.
If you don’t have fire extinguishers, it’s crucial to buy one immediately. Buy one extinguisher for your kitchen, one for your garage, and then any additional extinguishers to place strategically across the house. Ideally, you should have one fire extinguisher per floor.
5. Schedule Annual Inspections
While we’re thinking safety, take a minute during your spring cleaning to put down the broom and pick up the phone to schedule annual inspections. Checking your HVAC system is a crucial seasonal task, but you may want to take it a step further and do a home maintenance inspection. These are more complete assessments that look at your plumbing, electrical circuits and fixtures, water heater, foundation, and more.
Performing regular inspections on major equipment like your HVAC system is crucial in saving you time, money, and comfort. Finding problems in their infancy often makes the repairs cheaper and helps your system last longer. Plus, you don’t have to wait until it fails and go for days without being able to use your air conditioning.
6. Dust Your Ceiling, Light Fixtures, and Fans
Once you finally start with the “cleaning” part of spring cleaning, it’s crucial to follow the cardinal rule to ensure you have the most stress-free experience: Start high, end low.
With gravity pulling down all of the loose dirt and dust you stir up, there’s no point in starting with your floors. Instead, begin cleaning as high as possible, which generally means your ceiling, light fixtures, and ceiling fans.
Get rid of cobwebs in the corners and dust on the ceiling with a broom. To dust light fixtures and fans, buy an extendable duster or get on a ladder to wipe them off with a microfiber cloth. Don’t worry too much about where dust falls because you’ll eventually get it when you sweep and vacuum.
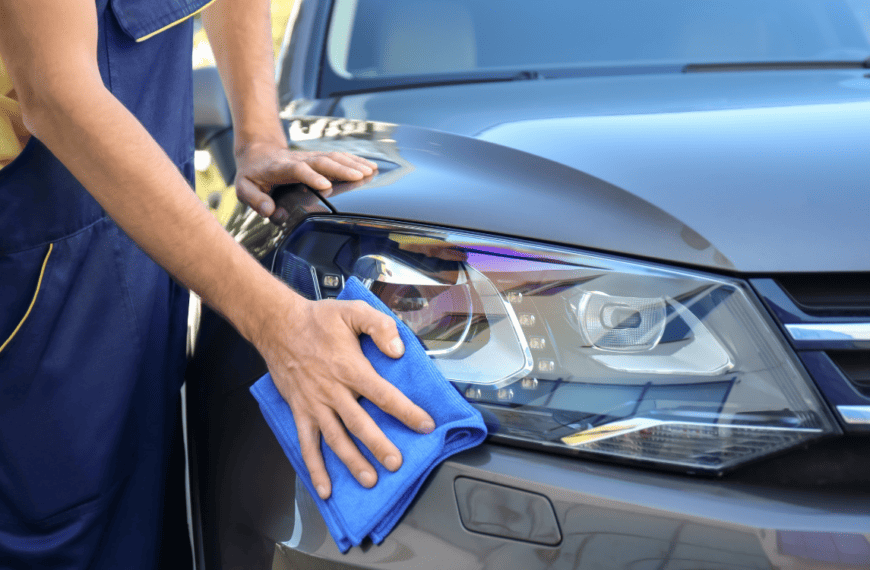
7. Wash Windows and Treatments
According to most spring cleaners, windows are the dirtiest areas of their homes. It makes sense when you consider not only how awkward they are to wash (especially the outside) but also how many nooks and crannies they have to hide dirt.
After cleaning your lights and ceiling fans, clean your windows with a commercial glass cleaner or a homemade cleaning solution. Make a DIY window cleaner by mixing 1 cup of water, 1/8 cup of white vinegar, and a ¼ cup of rubbing alcohol in a plastic spray bottle. To make the job quicker and easier, check out these five tricks for keeping your windows clean.
While you’re cleaning at window level, go ahead and touch up your window treatments as well. Use the upholstery attachment on your vacuum to clean your curtains. Throw them in the washing machine on its gentlest cycle if they’re noticeably dirty. To quickly release dust, toss your curtains directly in the dryer with a fabric softener sheet, which will help draw static.
If you have blinds, you know how fast they collect dust. Fortunately, you can clean blinds without taking them down by using a duster, soapy water, and a vacuum.
8. Dust Shelves and Picture Frames
After windows come the living room bookshelves and pictures. Running a duster over the top surfaces is usually sufficient to clean them. While you’re at it, use your duster to hit any window sills and tops of window and door frames around the house.
9. Clean Walls, Doors, and Baseboards
We don’t clean them often, but walls, door frames, and baseboards collect a surprising amount of grime. To give them all a thorough cleaning, start by mixing a few drops of dish soap in a bucket of warm water. Soak a sponge in the soapy water, wring it out, and use it to remove dirt, scuff marks, handprints, and all sorts of other stains.
10. Clean Your Appliances
Cleaning surfaces and putting away dishes are easy and obvious tasks, but spring cleaning is the time for rolling up your sleeves and getting into the dirtiest corners of your kitchen. In most cases, those corners are in the backs of your appliances.
It takes a while to clean your oven, so you will want to make a plan for tackling that job. For the rest of your appliances, you can clean them from beginning to end at one time.
Soap and water are enough to clean most appliances inside and out, and it’s gentle on surfaces that harsher cleaners might damage, such as stainless steel. It’s critical to not only clean the inside of your appliances but also under and behind them.
Remove the kick plates from your dishwasher and refrigerator and the drawer from your oven to vacuum under them. Take the opportunity to swap out or clean your appliance filters as well, such as your dishwasher filter or your refrigerator’s air and water filters. Check your refrigerator’s drip pan as well, as it’s a common source of nasty fridge odors and mold.
11. Organize the Pantry and Kitchen Cabinets
Go through your pantry and kitchen cabinets to clean shelves, change shelf liners, and declutter. Check for old food, spices, and baking staples past the expiration date and pitch anything you don’t need. Get rid of any small appliances you haven’t used in a while to clear up even more space.
Now is a great time to upgrade your pantry storage as well. Clear plastic containers to replace cereal and pasta boxes offer a cleaner, organized look while keeping your food from going stale or attracting pests. Add further practicality with wire baskets and canned food dispensers.
12. Clean Sliding Door Tracks
Sliding door and window tracks collect a ton of filth, so they should always be part of your spring cleaning checklist, if not your monthly to-do list. Unfortunately, they can also be rather frustrating to clean with their tight corners. In dealing with these grimy gutters, we recommend the cleaning solutions you use on your sliding shower door tracks to clean soap scum and mildew — vinegar, baking soda, a cloth, and an old toothbrush.
Make a paste by mixing baking soda with water, and apply it to the door tracks. After several minutes, scrub them well with a cloth or soft brush and rinse with water. For a faster solution, use a vinegar spray cleaner to break down and remove dust and grime so you can wipe it clean.
13. Deep Clean Carpets
You likely vacuum carpets often, but a spring clean deserves an extra effort. Rent a steam cleaner to give your carpet a deep cleaning. Steam will lift deep-down dirt and kill dust mites, mold, and other microbes to make your entire home healthier.
While steam cleaners are effective on most stains and odors, they can reactivate and worsen old pet urine stains. If you notice a foul pet odor after steam cleaning, locate the urine stain and clean it with an enzyme cleaner to remove lingering waste.
14. Vacuum and Steam Clean Upholstered Furniture
As with carpets, steam cleaning can completely revitalize upholstered furniture and throw pillows, removing all kinds of past stains and dug-in dirt. Before cleaning, it’s crucial to check the product care tag. Some fabrics only do well with solvents, while others require dry cleaning solutions, so it’s critical to use the correct product to prevent damage.
15. Polish Wood Furniture
Wood polish instantly brightens the room, indicating to any visitor that you put some serious effort into your spring cleaning. For finished wood, use a commercial polish, or make a DIY solution by mixing one part olive oil and one part vinegar or lemon juice in a spray bottle. Spray the polish on your wood furniture and buff it with a microfiber cloth.
16. Power Wash Outside
Spring cleaning isn’t just for your indoor areas. Break out the pressure washer and give your siding, driveway, deck, and patio a quality cleaning with a high-powered cleaner.
17. Clean Your Gutters
Gutters are the unsung heroes in preventing mold and foundational damage around your home. Set up an extension ladder and clear any leaves, growth, and other gunk out of your gutters. A large pasta fork is an excellent tool for this, and you can follow up with a hose to rinse out any remaining debris.
After cleaning, check for loose or damaged sections to repair. Adjust the downspouts to direct water away from your home.
18. Trim Back Plants
Look around your home’s perimeter for leaves, brush, and vegetation that are starting to encroach on the house. These act as conduits for pests and moisture to attack your house.
Pests use vegetation for shelter and as bridges to get into your house. Meanwhile, moisture can travel on branches and plants that touch your house, spreading into your walls to produce mold. Strive for a solid two feet of clearance around your home’s perimeter to create a quality defense.
19. Prepare the Patio
Spring cleaning isn’t all toil and tedium. Take a break from the cleaning and start setting up your patio for the season. Set up the grill and pull out the outdoor furniture so you can get excited about summer and find some extra motivation to get through your spring cleaning checklist.
20. Organize the Garage
Last but not least is the garage organization. Employing your bin system from earlier, sort the clutter and discard anything that’s no longer good or never gets any use. Use the opportunity to swap out your seasonal gear as well, bringing out your gardening and outdoor sporting equipment to have it on hand for the coming months.
Spring Cleaning Tips for Successful Tidying
Start high and end low, start big and end small. Remember those rules, and you’ll ensure you’re always making steady forward progress. When you begin cleaning by organizing clutter and dusting the ceiling, it makes the job so much easier. Beyond that, we’ve got a couple of extra spring cleaning tips to keep in mind.
Work Toward the Door
Not sure where to start cleaning? Go to the back corner of the room, and move everything towards the door. The idea is to get dirt, dust, and useless junk out of the house, and that starts with getting it out of the room. By progressing everything in one direction, you’ll ensure you’re not cleaning the same spot twice.
Know When to Quit
Sometimes you just have to throw in the towel and know when to stop cleaning and start replacing. Is the caulking around the tub black with mold, or is the shower curtain opaque with mildew and months of soap scum buildup? Spring cleaning is enough of a headache, so in many cases, it’s well worth it to skip the work and buy new.
Skip the Work, Book with Anita’s!
Speaking of skipping the work, did you know there’s a simple way to knock out your spring cleaning checklist without lifting a finger?
If you’re tired of handling the deep clean yourself, give yourself a break and book an experienced house cleaner to do it for you! In just a few quick clicks, we’ll connect you with trusted local professionals who can fit your schedule and custom cleaning needs. Book a spring cleaning today to refresh your entire home top to bottom!