Cleaning around the kitchen doesn’t rank high on my list of favorite chores — unless we’re talking about seasoning my griddles. While scouring pans is always laborious and never fun, seasoning an outdoor flat top is almost cathartic. Seeing and feeling that smooth, stick-free surface is pure satisfaction, and I can’t overstate the difference it makes when it’s time to cook.
Unfortunately, I’m pretty decent at maintaining seasoned griddles at this point, so I don’t get the fulfillment in doing it from scratch too often. But to borrow a phrase, “those who can’t do, teach”, and since my griddle is between seasonings at the moment, I can at least indulge myself in talking technique.
How do you season a Blackstone griddle? I’ll explain the ins and outs of this simple process to help you get the most from your flat top this summer.
Before You Begin: Common Mistakes To Avoid
- Using a thick layer of oil. Anything other than a thin layer of cooking oil on the griddle surface can cause sticky patches and potential peeling
- Seasoning with the wrong oil. Certain kinds of cooking oil have the right fats and smoke points to improve your results
- Neglecting to clean after each use. Whenever you finish cooking, a thin seasoning layer will ensure your grill is protected and ready for the next use
How Do You Season a Blackstone Griddle?
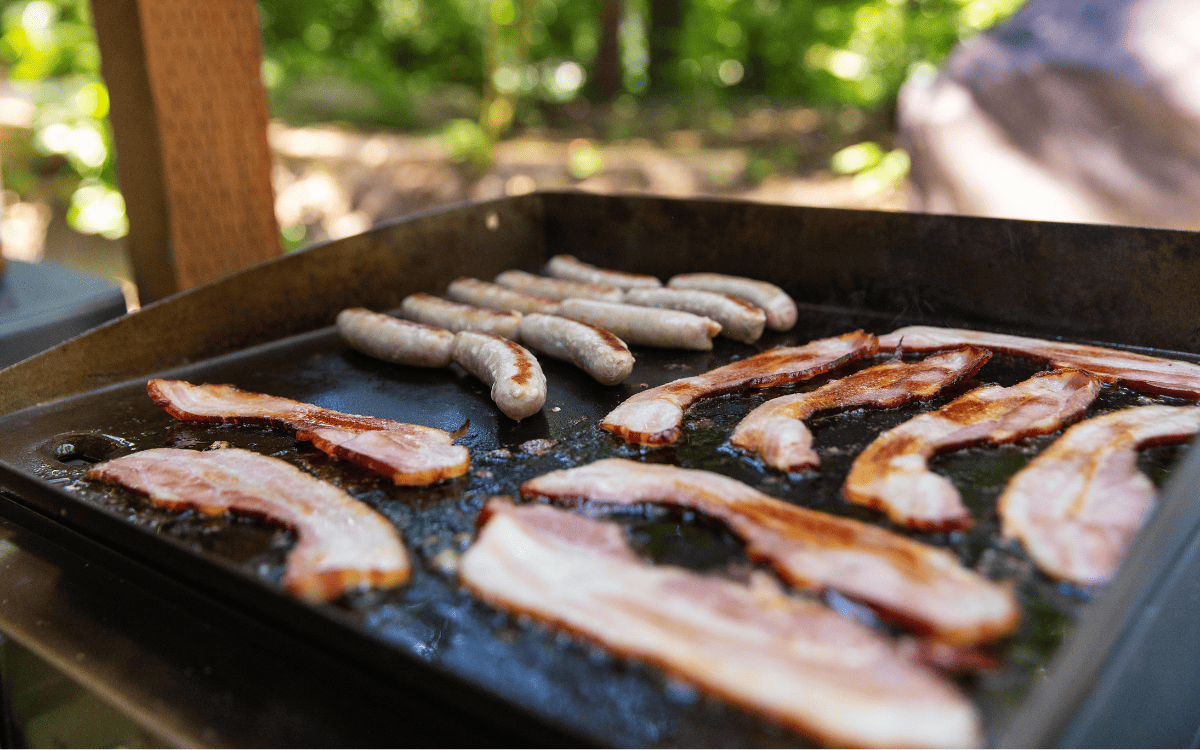
A seasoned grill is like a car battery – once it’s charged, you only have to drive every once in a while to keep it in good condition. Most of the seasoning occurs with every use. Your cooking oil keeps adding layers, whether it’s extra virgin olive oil for sauteing veggies or the fat that rolls off a sizzling pack of bacon. The more you use the flat top, the more you build on the griddle plate, fortifying the protective coating.
You’ll do three general types of seasoning with a Blackstone — the initial seasoning, seasoning with each use, and a recovery seasoning when your cooking surface starts looking a little worse for the wear.
Seasoning a Brand New Blackstone Griddle
Griddles come from the manufacturer with a light layer of vegetable oil, mineral oil, or other protective coating. It isn’t a seasoning but rather a moisture-resistant coating to ensure the unit arrives at your door rust-free and ready to cook.
Ideally, you’ll remove this layer to start with a fresh base for seasoning. Plus, Blackstones will still pick up dust and other contamination between the factory and your home, which you’ll want to wash off immediately. The point is, always clean your new Blackstone griddle top as soon as you get it. Once it’s clean, you can build a few solid seasoning layers and start cooking.
Tools and Materials
- Non-abrasive scrubber
- Paper towels
- Heat-resistant gloves (e.g., Sopito Heat-Resistant Gloves)
- Tongs
- Mild dish soap (e.g., Blue Dawn)
- Warm water
- Blackstone Griddle Seasoning or cooking oil (e.g., canola oil, avocado oil)
Step 1: Clean the Griddle With Soapy Water
Pour warm water on the griddle and add a few drops of mild dish soap. Gently scrub the soapy water into the cooking surface with a non-abrasive scrubber or brush. Rinse well with fresh water and dry with paper towels.
Step 2: Preheat the Griddle on High
Turn your Blackstone griddle on and preheat it on high heat for roughly 10–15 minutes. The cooking surface will change to a brownish shade, indicating it’s hot.
Step 3: Apply Your Seasoning Oil
Drizzle a few tablespoons of cooking oil on the griddle to thoroughly coat the surface (~3–4 tablespoons for a 36” Blackstone). Holding a paper towel with your tongs (the surface will be HOT), wipe the entire cooking surface to spread the oil into a thin, even layer. Ensure you rub oil over the inside and outside of the side walls as well. Move carefully to prevent dry patches or thick oil puddles.
Note: Some people turn the burners off and let the griddle cool slightly as they apply the oil. They will then turn the burners back on high to let the oil smoke. Whether or not you turn off the flat top when you wipe it with oil is a personal preference, with neither method affecting the final result.
Step 4: Let the Oil Smoke Off
The seasoning will smoke when you apply it. As it heats, the oil’s long-chain fatty acids break down into smaller chains that polymerize on the cooking surface and bond tightly with the iron. You should see the oil finish smoking after about 10–20 minutes.
Step 5: Repeat Steps 3–4
Add 2–4 more seasoning layers by repeating steps 3–4. Each layer you put on the hot griddle surface will darken it more, building the hard, smooth, and non-stick coat over the metal.
Step 6: Let the Griddle Cool, and Wipe With Oil
Turn your Blackstone off, and let it cool. Apply another thin coat of cooking oil to the griddle’s entire surface with a paper towel. The final oil layer won’t burn off but instead sit as extra protection while the flat top is in storage. You’ll burn off this coating when you fire up the unit during your next cookout.
The entire Blackstone griddle seasoning process can take up to an hour. There is some flexibility in the process and the number of seasoning layers, so depending on your preference, it may take much more or less time.
Seasoning While Using Your Blackstone Griddle
Paying attention to the seasoning whenever you use your Blackstone will ensure the long-lasting, non-stick surface stays in good shape. Spread your cooking oil evenly around the flat top grill surface as you cook to let it smoke off and set in smoothly.
After cooking, spare a few minutes to clean your griddle plate by scraping the left grease and food debris. Apply a thin coat of oil to the entire griddle surface with a clean paper towel before storing.
Re-Seasoning a Damaged Blackstone Griddle
After a few months or numerous uses, you may eventually notice your Blackstone griddle surface is becoming flaky and uneven. Occasional neglect can cause cumulative damage, and eventually, you’ll likely consider starting fresh. Before going through the seasoning process again, the griddle top will need a partial or complete strip with an abrasive tool to correct the surface.
Sanders or Drill Attachments
You can strip back a Blackstone’s seasoning layer to the smooth metal underneath to restore the clean look and consistent smoothness. I recommend using an orbital sander with coarse grit sandpaper, especially for tough, stuck-on seasoning layers and corrosion. Sand away the dark seasoning until you expose the silver color of clean Blackstone griddle metal underneath.
You could try a drill or angle grinder attachment if you don’t have an orbital sander. A wire wheel or strip disc can buff away the hardened layers with a steady hand. Bear in mind that it still takes a decent amount of elbow grease and time to complete. Grinding may take over an hour when there’s significant buildup.
Pumice Grill Brick
While power tools may work for some people, I’ve always had enough luck removing flaking seasoning and other damage by applying force with a tool like a grill brick, steel wool, or sandpaper. After an initial cleaning with the grill scraper, I’ll add a few tablespoons of oil to the surface and scrub the damaged areas to smooth the grill.
A griddle brick is a great way to manage your Blackstone when your seasoning starts flaking. You don’t need to wear the entire surface perfectly to bare metal. As long as you remove the brittle pieces to make a smooth, seamless surface, you can effectively redo the seasoning for long-term durability.
After stripping down the surface, wash with soap and water and rinse before re-seasoning. If the surface is clean, there’s no difference between seasoning a new griddle and re-seasoning an old one. Heat your griddle, apply and smooth out a layer of oil to smoke for several minutes, and repeat until it reaches the desired smooth, black texture.
Maintaining a Well-Seasoned Griddle
The best way to keep your Blackstone griddle in good condition is to use it regularly, clean it every time, and apply oil after each use. The initial seasoning process is crucial, but the condition of your griddle top after cooking will play the biggest part in how it holds up for the long term.
Applying a thin coat of oil after each use is enough to maintain your griddle in most cases. But depending on what you’re cooking, you may wear out your seasoning layer faster than that light layer can manage.
Acidic ingredients, like tomatoes, citrus, or wine, are a perfect example of foods that can wear on seasoning. If I cook with foods like these, I’ll usually bolster my griddle seasoning by doing an extra layer after cooking, applying my oil to the flat top and letting it smoke on high heat for several minutes. In general, if you notice sticky or worn sections while cooking, take the extra precaution of adding a seasoning layer afterward.
Secrets to Seasoning Success
I can’t highlight enough the need to apply a THIN layer of oil. The number one mistake people make when seasoning their Blackstones is using too much with each layer. Thick pools of oil won’t properly polymerize with the rest of the seasoning. You’ll then have sticky sections around the grill that will increase the chances of flaking. When that happens, you’ll be back to square one but with the added task of stripping the surface before re-seasoning.
Apply the thinnest layer of oil possible, using extra paper towels to remove excess when necessary. You’ll speed up the process and enjoy the results much more. Beyond that, follow these essential tips to improve your Blackstone’s seasoning.
Choose the Best Oil
Once you get your flat top seasoning up and running, your Blackstone becomes much more forgiving about what oils you can add to the layers. For the first run-through, you need to be more discerning. You’ll have plenty of practical options, but the best oils fit a few essential criteria, including:
- High smoke point: A high smoke point oil will reach the perfect point where it smokes off without burning, creating a beautiful polymerized coating and blackened carbonization
- Higher unsaturated fat percentage: Unsaturated fats (particularly polyunsaturated fats) are the only kind that can polymerize and form a durable coat over the griddle plate
- Neutral flavor: A neutral flavor is usually more desirable to prevent transfer to your food
What Is the Best Oil to Season a Blackstone Griddle?
Some of the best oils to season a Blackstone griddle include avocado oil, sunflower oil, and peanut oil. Grapeseed oil was our top pick among effective oils for cast iron skillets, and its high smoke point, high unsaturated fat content, and neutral flavor are also a perfect fit for the flat top. For affordability and convenience, canola oil and Crisco are excellent alternatives that hit most of the points you want from a quality seasoning.
Once your initial seasoning is established, you can worry less about the types of oils going onto your Blackstone. Alongside your standard vegetable oil, you can cook with more imperfect oils like coconut oil or bacon fat. While they’re far from ideal, they’ll still add some unsaturated fats to the surface. Of course, oils high in saturated fats are also less healthy, so you may want to skip them whenever possible, even if you aren’t worried about your griddle’s seasoning.
Store Your Grill Correctly
Blackstones can enjoy plenty of downtime, especially if you live in colder northern climates. During the off-season, stored griddles still face stress from their environment. Your seasoning layer will be essential in protecting against the elements. But if you want to keep your entire griddle safe, you must practice safe storage habits.
The easiest way to avoid damage no matter where you keep your griddle is to store it with a grill cover. A heavy-duty cover will resist moisture penetration and protect against UV light, preventing unnecessary wear over the entire unit. Try to store your grill in a covered area, like a garage or shed, but always use a cover for added protection.
Check Your Grill Frequently While in Storage
Even after seasoning your griddle, slapping on a cover, and storing it, you shouldn’t leave your Blackstone unattended for too long. Moisture, oxygen, and contaminants can reach any flat top in the right circumstances. If you let them cause unchecked damage for weeks, you’ll have a substantial cleanup to handle when the grilling season rolls around.
Check your Blackstone once every week or two while it’s in storage. Rust will continue growing once it sets. By sparing 15 seconds to check your flat top a few times a month, you can catch rust early when it’s easiest to clean. If corrosion appears, check out our article on how to clean rust off your Blackstone to prepare it for a fresh round of seasoning.
Why Should You Worry About Seasoning?
Seasoning does two critical jobs for your griddle surface — protecting against rust and giving your flat top grill a slick, non-stick surface that lets food easily glide off.
Like cast iron, a carbon steel Blackstone griddle is constantly in danger of rusting from oxidation damage. Since it doesn’t have a naturally corrosion-resistant layer ala stainless steel or aluminum, carbon steel needs you to create it instead in the form of seasoning. Your flat top will last longer and keep its pristine look while making every cookout more enjoyable. Seasoning can even improve searing, ramping up the flavor of your steaks with each progressive cook.
Without seasoning, you can’t use your Blackstone. It will rust, food will stick, and you’ll have a horrible experience during your brief time with your flat top. Take pleasure and pride in how you season your Blackstone griddle, and savor the results of your efforts every time you fire it up.

